Classes

Fire Dynamics ! Round Pole & Earth Oven Workshop

This slideshow requires JavaScript.

January 18 & 29, 2017

This elemental class started with a hand-on exploration of the evolution of fire usage, and how fire works. We FIRED IT UP … moving from a bonfire to reflective bricks, to a chimney and a Rumford Fireplace …to a metal woodstove.  Then we warmed water on a Rocket Stove Outdoor Cooker, which demonstrated the dynamics of the combustion unit of the Rocket Stove Mass Heater in the pole barn which heats a bench. Firing up the heated bench was a highlight and shear pleasure to sit on !    A joy to be Fire-making all day long !

The workshop included a class on the principles of rocket stoves and the brick mockup construction of the Rocket Stove combustion unit.  The earthen materials used on a Rocket Stove were demonstrated: cob (without straw), finish earth plaster, and earthen mortar for the bricks.

Sunday we learned the basics of Earth Oven design, and made a small model of an earth oven first stages: laying the brick floor, removable sand mold for the oven dome, then shaping the oven mass over the sand mold with “oven mud”. The weekend culminated in making pizza in the Sun Earth Oven ! Yum.    

Students: Chrystal, storyteller from Detroit, Tim & Emily from the South Bend, Indiana area. Tim works with kids and permaculture, Emily – a counselor for immigrants. Kelly,  musician, works with disabled adults. Angela from Detroit, organic gardener & community spirited. 

Categories: Classes, Earth Oven, local materials, Rocket Stove, Uncategorized

Candle-making Classes

December 10th & 11th, 2016

What a joy to come together in the cold of winter to make candles…of local bees wax …with a sweet smell.  Celtic music in the background.  Children, parents, all ages.

One person said, “Every day should be like today ! ”

We also sculpted candlestick holders and decorated match boxes with things from nature, like birch bark and seed pods …making a nice “warmth of the season” gift set.


Hey, anyone have pics from the Dec 10th Class?  There must be some awesome ones somewhere !  That was a fabulous day, and the kids were so engaged.

Folks that attended:  Lori & Gil, Caleb & Sam… Paul, Linda, Holly, Vicki, Sue, Suzy, Caryn, Hazel, Drake, Nancy Lou, 3 children, Julie and Eric !   Dorinda and Agnus, Dave and children Maria and sister  joined in candle-making on January 3rd.  

Categories: all ages, Candle-making, Classes, crafts, local materials, sustainable skills

July 2016 ~ Activities

JULY, 2016


Tyler Schaeffer and Abby Johnson are a dynamic Intern duo that helped make an OAK & OAT thatched ridge cap on a Wood Shelter by the Strawbale Studio.  We received help from Flemming Abramsson, Danish Master Thatcher via phone & scanned drawings, so that we could create this awesome Ridge Cap.


AUGUST, 2016
Patrick, Jacob & Samad are at the Strawbale Studio for the month, learning & helping complete projects.  This week started with lessons on round pole lashing and notching.

Traditional cultures commonly 
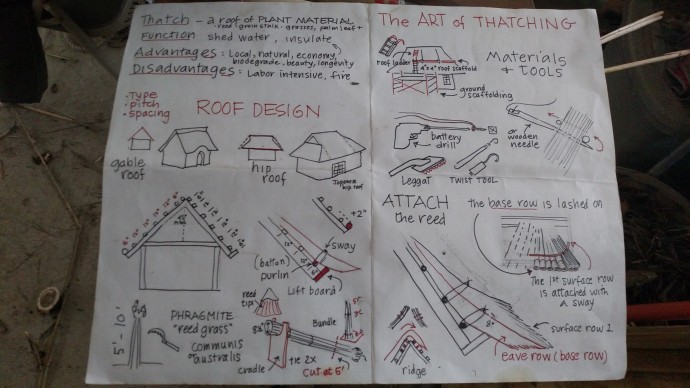
used round poles, which fit very well with thatching.  Thatched roofs are able to respond to round poles irregular shapes and lashing.

Notching techniques integrate the use of chisel, wooden mallets & saws.  Round Pole construction incorporates a draw shave to debark  the wood and a saw horse and draw knife to shape wooden pins that attach the framing members. The poles were hand-harvested from the woods on the land with a hatchet and a saw.

In the photo, the team is making a small truss for a future structure on the land. They are “reading the log”, snapping chalk lines to make reference lines and creating lap joints.

Categories: Internship, Internship & Worktrade, Projects, Thatching, Uncategorized, Worktrade

Winternship 2016: Thatching Workshop

On Saturday January 10th, in the comfortably cold winter woods of Oxford, Michigan, six workshop attendees traveled long and far, from Howell, Goodrich, and even internationally from Ontario, and all arrived to the warm welcome of Strawbale Studio’s 2016 Wintership crew: seven “Winterns” guided patiently and joyful by Deanne. It was the first of the weekend workshops in January and the topic was everything Thatching!

Motivations for learning were quite varied, but most all of us were greenhorns when it came to thatched roofs. Brian and Heather came from Howell Recreation Center to explore options to re-thatch a hut in their houses of the world exhibit. Mary came from Ontario hoping to reignite some energy to finish a small thatched roof project. Though many of us didn’t have particular projects in mind, we were enthused to learn a craft that could meet the universal need for putting a roof over one’s head.

After introductions and delicious snacks in the rocket stove warmed Red Shed, Deanne gave an overview that loosely followed these topics, at least as far as my notes go: roof function, roof designs, reed quality and selection, advantages and disadvantages to thatched roofs, and thatching tools.

IMG_20160112_161718878

The Art of Thatching!

Thatching is described as any roof made of plant materials, so this largely depends on the climate and plant availability; materials include using palm, grasses, reed, sticks, or moss. Generally, the material selected will be used for shedding away water and insulating a structure to be cool in the summer or warm in the winter. The material that is abundant in this area and used on many roofs here is called Phragmites, also known as water reed. Phragmites is invasive to this area and outgrow native plants including the cattail.

Phragmites is pervasive throughout the region, so finding it isn’t hard, but harvesting good quality reed is more of a challenge. Firstly, it is important to select reed with consistent size, shape, straightness, bright color, and compression and tensile strength. It is common to find Phragmites up to 12 feet tall, but harvesting reed that is four to six feet, small diameter, and not too gray due to drying or mold is ideal.

A reed thatched roof has many advantages. As mentioned, the materials can be harvested locally with no cost. The aesthetic appeal of a nicely thatched roof is quite becoming and it isn’t uncommon to expect to see some Hobbits scurrying about. In Michigan cold winters, the thick thatched roof provides great insulation and can last twice as long as modern roofs up to 50 years.

However, there’s always a downside; harvesting reed is quite labor intensive, taking about 30 minutes per bundle, and requiring roughly one bundle per one square-foot of the structure’s footprint. Yet, to quote Deanne directly from this day, “My goal is to connect with nature; not just to be efficient.” There’s also potential for fire hazard, but with proper sealing with cob or other materials, the thatched roof is similar to wooden shingled roofs. Harvesting also generally needs to happen in the winters, when the reed has died and the wetlands are accessibly frozen over. 

Thatching and reed collecting have a handful of common and particular tools for the trade. Some are shown in the Art of Thatching picture above.

Following the overview, Deanne did a half-scale thatching demonstration inside the red shed. Then we meandered outside to observe the Kid’s Cottage, Strawbale Studio, and a few smaller structures to review the thatched roof in completed projects.

Hands on Thatching!

We all divided up to two groups for some hands on experience. One group did some wood harvesting for materials needed for thatching. And the other group, eventually joined by both groups, did thatching on a small A-frame wood storage structure. Most of the pictures in the following slideshow collage are from the hands on thatching on the A-frame. It roughly follows a step by step guide, but this blog post is already too long to go anymore in depth! Enjoy the photos:

Sunday was slated to be a field trip to the reed field to learn harvesting reed bundles. However, an ice storm coated the reed with freezing rain, and plans changed to a  delightful indoor discussion on Canadian and United States’ politics and the state of the world. Always something to learn, everyone brings something interesting to the table!

Categories: Thatching, Winternship, Workshops

Papermaking & Berry Ink Class with Dana Driscoll

In this amazing workshop we learned how to make handmade paper using locally-gathered cattail fibers and create inks from in-season berries!

Instructor, Dana Driscoll, who has over 15 years of hand papermaking experience, shared a brief history of papermaking, basic principles and demonstrated how to make beautiful pieces of cattail fiber paper. We also made our own berry inks and experimented painting and drawing with them.

Dana discussed ink creation, berries and available colors, preservation, permanence, and different ways to use these delightful inks !

Blog article by Dana Driscoll from her website.

Papermaking, Part II: Papermaking From Plant Materials (Cattail Fibers) July 9, 2012

In my last post, I detailed the steps for making handmade paper from recycled materials.  In that post, I also detailed the basic steps of making paper, from blending to couching to pulling and pressing sheets.  Recycled fibers are a great way to start, but you may find yourself interested in papermaking techniques using nothing but what is available from the land around you.  Plant-based papermaking is an advanced papermaking technique, so I suggest you start with recycled papers, and once you are comfortable with that process, move onto this one.

I’m going to be using cattail fibers, specifically, those of the flower head/seeds/fluff as an example for this post.  You can use a lot of different fibers for the plant-based paper process, including reeds (with hard, woody bits removed, cattail leaves, burdock (the whole plant), various grasses, etc.). We also have a lot of invasive phragmites around here; I have found that their leaves (but not stems) make excellent paper too. Each potential papermaking plant requires a “getting to know you stage” for example, burdock stems make better paper than the leaves, unless you dry the whole thing first.  What you want in a plant is some strong fibers so that your paper has strength, but not so woody that stems, etc get into your paper–thick stems won’t cook down in the process I’m describing below.  So something like the leaves of reeds, or the leaves (but not stems) of corn work for this.   Creating pulp from locally-sourced plants is pretty much an experiential art form, so you really just need to pick the plants, boil them down, make some pulp, and see what happens! But the cattail fibers are a pretty safe bet for your first attempt, hence why they are used as my example here.

Finished piece of cattail fiber paper

Ethical Foraging and Gathering
Make sure when you are gathering wild materials that you are doing so in an ethical manner. This includes:

  • Do not over-harvest: pick only in areas that have a healthy amount of the plant growing, and leave plenty behind.  Don’t ever harvest endangered plants.
  • Make sure you have permission: public lands and state parks are often off limits; gain permission from private landowners before harvesting–chances are, if you share with them what you are doing (or a bit of your end product), they won’t care.  You should also ask permission from the spirits of the land.
  • Consider your timing: part of why I harvest the cattail heads in the spring is because the plant is dead; I am just harvesting the seed pods.
  • Be thankful: remember to be thankful for all that you take from the land.  In some pagan traditions, people leave a little offering like a silver coin, etc, near the plant.  Honestly, I kinda think this is pretty silly.  If I’m going to leave an offering in thanks, I do one of two things: leave something that would be edible to wildlife (e.g. some wheat berries or sunflower seeds or apples) or else do something that helps the land (like participating in a river clean-up).  Make whatever you are doing in thanks ‘count’ and have an actual, lasting impact.

Gathering Cattail Heads

I happen to live in an area with a ton of wetlands, so cattails make a perfect locally-sourced paper pulp.  I go out in the spring–early spring is fine–and gather the dried heads from the previous season.  You can find them in great numbers along roadsides or near ponds.  On a warm spring day, I went out and gathered a  large box full of the heads–probably about 40-50 or so of them.  Unlike most foraging, where you have to be concerned about gathering from near roadsides, with papermaking materials you don’t, since you won’t be ingesting any of the materials.  I should add that if you are gathering anything in a marshy area, having a good pair of rubber boots is a wise idea.

Box of cattail heads, collected in spring along the roadside!

Preparing Fibers

Preparing plant-based fibers for papermaking requires some additional steps from the recycled paper instructions I posed last time.  First, you obviously need to get the fibers  in a pulp-like state.  For cattail fibers, this includes pulling them off their stems  and soaking them in a vat of water. (I used the stems to help start a fire, so they are not wasted; you can also compost the stems.)

Pulling fibers off of stems and placing in pot of water

Since you’ll be using something caustic to break down the fibers, its really important that you use a pot that won’t react to strong alkalai.  An enamel pot is a good choice for this; I also understand that stainless steel works, but I only have used an enamel pot.

Fiber is ready for cooking!

Once your cattail fibers are in the pot, you want to add some Soda Ash (usually found in the form of Arm and Hammer Super Washing Soda).  Super Washing Soda can be a bit tricky to find; look for it in your grocery store in the cleaning supplies near the laundry detergents.  I used to not be able to find it at all in Indiana, so I ordered it online in bulk (bulk because I also use it for laundry detergent and some other purposes). But in Michigan, our local Kroger store carries it.  I usually add about ½ – 3/4 a cup to a pot the size of this one; the ratios don’t have to be exact.

Mix in your soda ash and bring your concoction to a boil (but not a rapid one, a simmer is fine). Cook your pulp and soda ash mixture for about 3-4 hours; make sure you have good ventilation while cooking (use the stove fan, open window, etc.).  Stir it every 30 min or so, making sure it doesn’t burn.   I use a wooden spoon for this purpose, as I know it won’t react with the soda ash (but I don’t use that spoon for cooking).

As it cooks, you’ll notice that the fibers start to darken. This is because the soda ash is going to break down the non-cellulose content in the fiber—and we want the cellulose, but not the other stuff, for paper.

After 3-4 hours turn off the heat and let your pot cool down for a while.  Once your pulp can be handled, drain your pot.  Put on some rubber gloves and rinse out your fibers so that you get all of the Soda Ash out of there.  You’ll need to touch your pulp in later stages, so you don’t want it to be caustic.  For this purpose, I usually use a colander or else some cheesecloth—anything that you can rinse and strain the fibers is fine.

Pulp cooks for several hours

You can put your fibers back in the pot, adding additional water.  They are now ready to make into paper!

Blending and Pulling Sheets

Now that you have your pulp prepared, you can go ahead and treat it like any recycled pulp (which some additional considerations in the couching step).  I have more detailed instructions in my previous post, but the basic steps are:

1)     Blend your fibers: this is especially important with plant-based fibers, even short ones like the cattail fiber.  This will give you a more uniform pulp and better results.  Don’t put too much pulp in the blender at once—its really thick stuff.  For some pulps, like reed, you’ll really need to blend for a while.  The cattail blends quickly and easily.  Some others, not so much.  Really serious papermakers doing plant fiber paper actually buy professional blenders that help break down the pulp.  But if you are reading this post, my guess is that you aren’t that serious yet🙂.

Blender full of pulp

2)     Add your fibers to a vat of water (we are using the pull method for this, as detailed in my last post).

Pouring pulp into vat

3)     Pull your sheets of paper out of the vat using a mould and deckle.

Pulling sheet of paper from Vat

Freshly pulled sheet of paper

4)     Couch your sheets of paper.  Please note that some plant fibers are really hard to couch effectively—and even harder to peel from a sheet of newly pressed paper sheets (this is when you stack the couched sheets on top of one another).  Because of this, I suggest that you stack and press no more than three of them.  If you have trouble pulling the pressed sheets apart, simply don’t press them at this stage.  Just take a sponge and soak out as much of the water as you can.  Not pressing them to remove excess water means that they will take a lot longer to dry, but you’ll end up with nice sheets.  I had this problem less with cattail than I did with burdock and phragmite.  I found that if I pressed only a few sheets of paper, and didn’t press too much water out of them, they didn’t stick too badly.

Couching Sheets of Paper

5)     Let your paper dry, then enjoy!  You can iron your paper or press it overnight to get it to flatten out.

Sheets of paper drying (mostly cattail, but also some recycled and 1-2 burdock sheets)

Stack of cattail paper!  So pretty!

Categories: Classes, crafts, Papermaking, Uncategorized, Workshops

Blog at WordPress.com.